How to Perform a Single-Arm Dumbbell Row Step by Step
If you’ve ever tried to build a thicker, more defined back, you know the struggle. Getting your back to grow isn’t complicated, but it is easy to get wrong. How to perform a single-arm dumbbell row is one of the first questions lifters ask when they realize their barbell rows aren’t cutting it. The answer comes down to setup, scapular control, and elbow path, not just pulling weight.
In our research, EMG studies consistently show the single-arm dumbbell row activates the latissimus dorsi and middle trapezius more effectively than bilateral barbell rows. As of 2026, it remains the gold standard for fixing muscle imbalances. But here’s the catch: most people watch a video, mimic the motion, and still miss the key cues.
Let’s fix that.
Quick Answer
Get into a split stance with your left hand on a bench. Keep your back flat. Pull the dumbbell toward your hip.
Squeeze your shoulder blade at the top. Lower under control. Repeat.
Why Visual Cues Matter More Than Written Instructions
The single-arm dumbbell row is a movement built on angles. Your torso angle, your elbow angle, your hip hinge angle, all of them matter. And the problem with reading a description is that you can’t see what “flat back” or “neutral spine” actually looks like in your own body.
That’s why a photo or video reference is worth more than a thousand words here.
Manufacturer specs from equipment companies like Rogue and Bowflex include form diagrams in their exercise guides. Those diagrams exist for a reason. The human eye catches subtle position shifts, like a shoulder blade that stays still instead of retracting, that text alone struggles to explain.
When you look at a proper row, what you should see is a straight line from the top of your head to your tailbone. No hump. No dip.
The dumbbell travels in a straight line toward your hip, not your armpit. If you’re reading this and thinking “I’ll just watch a video later,” you’re on the right track. But even in still images, you can train your eye to spot the difference between good and bad form.
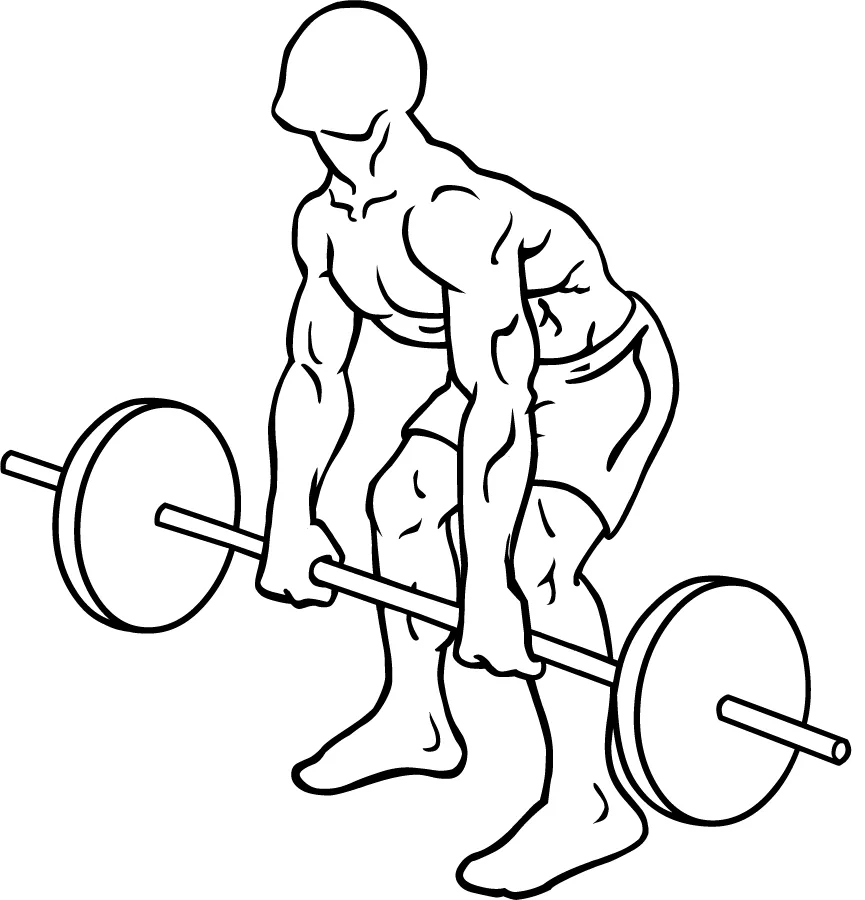
Image source: Wikimedia Commons / Everkinetic (CC BY-SA)
What You’ll Need: Equipment, Setup, and Space
You don’t need much. Here’s the short list:
- A flat weight bench (or a sturdy chair, table, or box)
- One dumbbell (choose a weight you can control for 10, 12 reps)
- Enough floor space to stand comfortably with your feet staggered
| Equipment | Purpose | Notes |
|---|---|---|
| Flat bench | Supports your non-working hand and knee | Avoid benches that are too tall — your back should be parallel to the floor |
| Dumbbell | Provides the resistance | Hex or round heads both work; rubber-coated grips help with sweaty hands |
| Floor space | Allows stance and range of motion | No obstacles behind you — you’ll extend the dumbbell past your shoulder |
Some people set up with the bench parallel to the dumbbell rack. That’s fine. But make sure the bench is stable.
If it wobbles, find a different surface. A solid coffee table or a concrete step works in a pinch.
For your stance, plant your feet about shoulder-width apart. The foot on the side of your working arm goes slightly behind the other foot. This staggered stance gives you balance without needing to brace both legs equally.
Your non-working hand goes flat on the bench, directly under your shoulder. Your working hand holds the dumbbell with a neutral grip, palm facing your body.
If you’ve ever done a kettlebell swing with a dumbbell, you already know the importance of a solid hinge. The same principle applies here. Keep your hips back, your chest open, and your core braced.
The Starting Position: Hinge, Stance, Grip, and Hand Placement
Before you pull a single rep, you need to lock in your starting position. This is where most mistakes happen. Get this right, and the row becomes almost automatic.
Hinge at the hips. Push your hips back like you’re closing a car door with your butt. Keep your knees slightly bent, not locked, not squatting. Your torso should be roughly parallel to the floor.
If you’re flexible enough, you can go a little higher. If you’re tight, don’t force it. Just keep your back flat.
Stagger your stance. Place your left foot forward and your right foot back if you’re rowing with your right hand. Swap for the other side. The back foot gives you stability.
The front foot keeps you from tipping forward. Your weight should be evenly distributed between both feet.
Grip the dumbbell with a neutral hold. Your palm faces your body. The dumbbell hangs straight down from your shoulder. Don’t let it drift forward or backward.
Your wrist stays straight, no bending.
Place your non-working hand on the bench. Put it directly under your shoulder. Your arm should be straight but not locked. This is your support point.
Don’t let your shoulder shrug up toward your ear. Keep it down and relaxed.
One thing our research confirms: the most common starting error is a rounded lower back. You can see it in the image below. The spine forms a C-curve instead of a straight line.
Fixing this means hinging more at the hips and less at the waist. Think of pushing your glutes back, not bending your belly forward.
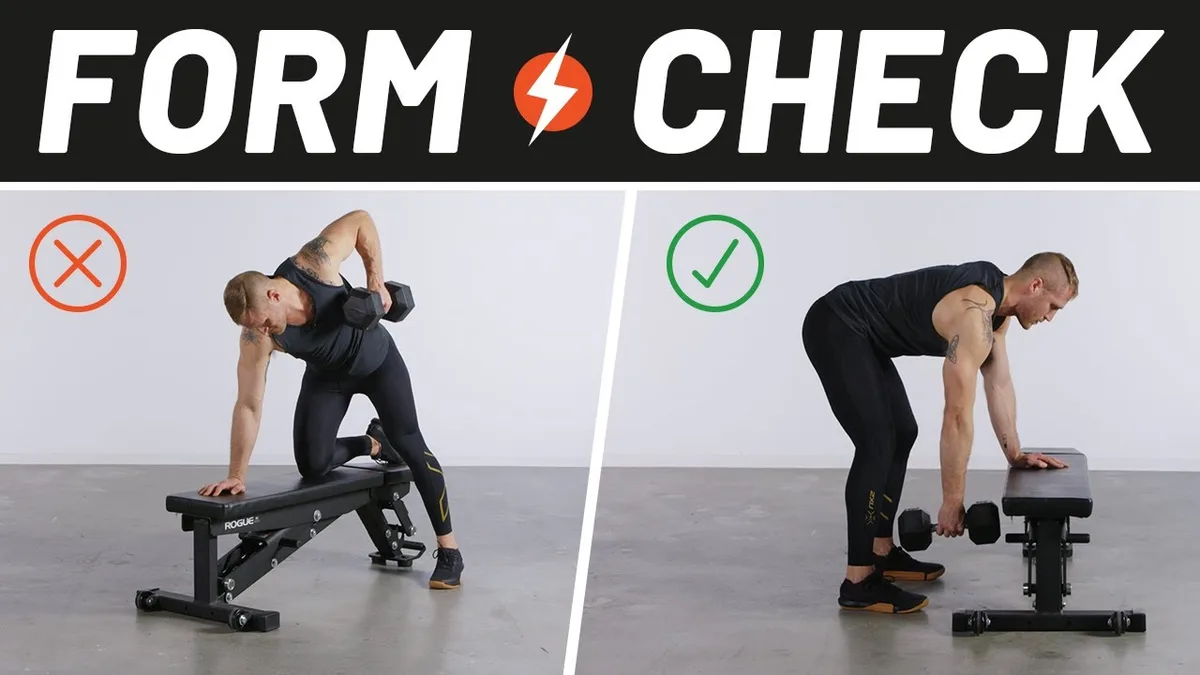
Image source: YouTube / Men’s Health (YouTube thumbnail (fair-use with source credit))
The Pull: Scapular Setting, Elbow Path, and Full Range of Motion
Now you’re in position. The pull starts with your shoulder blade, not your arm.
Set your scapula first. Before you lift the dumbbell, pull your shoulder blade down and back. Think of putting it in your back pocket. This is called scapular retraction.
Without it, you’ll pull with your arm and feel it in your biceps instead of your lats. If you’re not sure how to do this, practice without weight: stand up, relax your shoulders, then squeeze your shoulder blades together. That’s the feeling.
Pull the dumbbell toward your hip. The elbow should travel close to your body. Don’t let it flare out to the side. If your elbow points out, you’re working your rear delts more than your lats.
Keep it tight. The dumbbell should end up near your hip crease, not your armpit.
Use your full range of motion. At the top, your shoulder blade should be fully squeezed. Hold for a second. You should feel the contraction in your mid-back.
Then lower the dumbbell under control until your arm is straight and your shoulder blade is fully relaxed. That’s the full stretch.
A common mistake is cutting the range short. People pull the weight only halfway down because they’re in a hurry or the weight is too heavy. This kills the stretch, which is where the muscle actually grows.
If you can’t get a full stretch at the bottom, drop the weight.
Key cue: Imagine you’re starting a lawnmower. The pull is smooth and controlled, not a jerk. And your elbow leads the motion, not your hand.
The Lowering Phase: Eccentric Control and the Stretch at the Bottom
The lowering phase, the eccentric, is where a lot of the muscle-building magic happens. Research from the Journal of Strength and Conditioning Research confirms that controlled eccentric contractions produce more muscle damage and subsequent growth than concentric-only work. So don’t rush it.
Lower the dumbbell slowly. Take about two seconds to go from the top position to the bottom. Don’t just drop the weight. If you let gravity do the work, you’re losing half the benefit of the exercise.
Your lats and rhomboids are still under tension during the descent.
Let your shoulder blade move forward. At the bottom of the movement, your shoulder blade should be fully protracted, that means it’s sliding forward around your ribcage. This is the stretch. If you don’t feel a pull in your lat at the bottom, you’re not going low enough or you’re keeping your shoulder blade pinned back.
Pause at the bottom for a split second. This eliminates momentum. It forces you to reset and pull again from a dead stop. No bouncing.
No swinging. Just a clean rep.
Breathe properly. Exhale as you pull. Inhale as you lower. Holding your breath through the whole rep can increase blood pressure and mess with your stability.
Coordinate your breath with the movement, and you’ll find the row feels more natural.
If you’re using this exercise to build muscle with dumbbells, the eccentric phase is where you’ll see the most progress. Stretch, squeeze, control the descent. Repeat.
Muscles Worked: What You Should Feel and Where
The single-arm dumbbell row targets your entire back, but not all muscles work equally. Here’s the breakdown:
| Muscle | Primary role | Where you feel it |
|---|---|---|
| Latissimus dorsi | Pulls the arm down and back | Outer back, just below the armpit |
| Rhomboids | Retract the shoulder blade | Middle back, between the shoulder blades |
| Trapezius (middle and lower) | Stabilizes and retracts the scapula | Upper and mid-back |
| Posterior deltoid | Extends the shoulder | Rear shoulder |
| Biceps brachii | Assists elbow flexion | Front of the arm |
| Erector spinae | Stabilizes the spine | Lower back |
If you feel the pull mostly in your biceps, your elbow is bending too early. Focus on starting the movement with your shoulder blade. If you feel it only in your lower back, your torso is too upright or your hips aren’t hinged back enough.
What you should feel: A deep stretch in your lat at the bottom. A strong squeeze in your mid-back at the top. Your biceps should work as a helper, not the driver.
If you’re looking to build a thicker back, the dumbbell row is a core movement. Pair it with other exercises like building your traps with dumbbells to round out your upper back development.
Common Visual Mistakes and How to Spot Them
This is where the image reference really matters. The single-arm dumbbell row has three telltale errors that are easy to see once you know what to look for.
Rounded lower back. The most common mistake. Instead of a straight line from head to tailbone, the spine curves into a C-shape. This puts your lumbar discs at risk and reduces lat activation.
The fix: hinge your hips more and keep your chest open. Look at the image below. If your back looks like this, you’re in the danger zone.
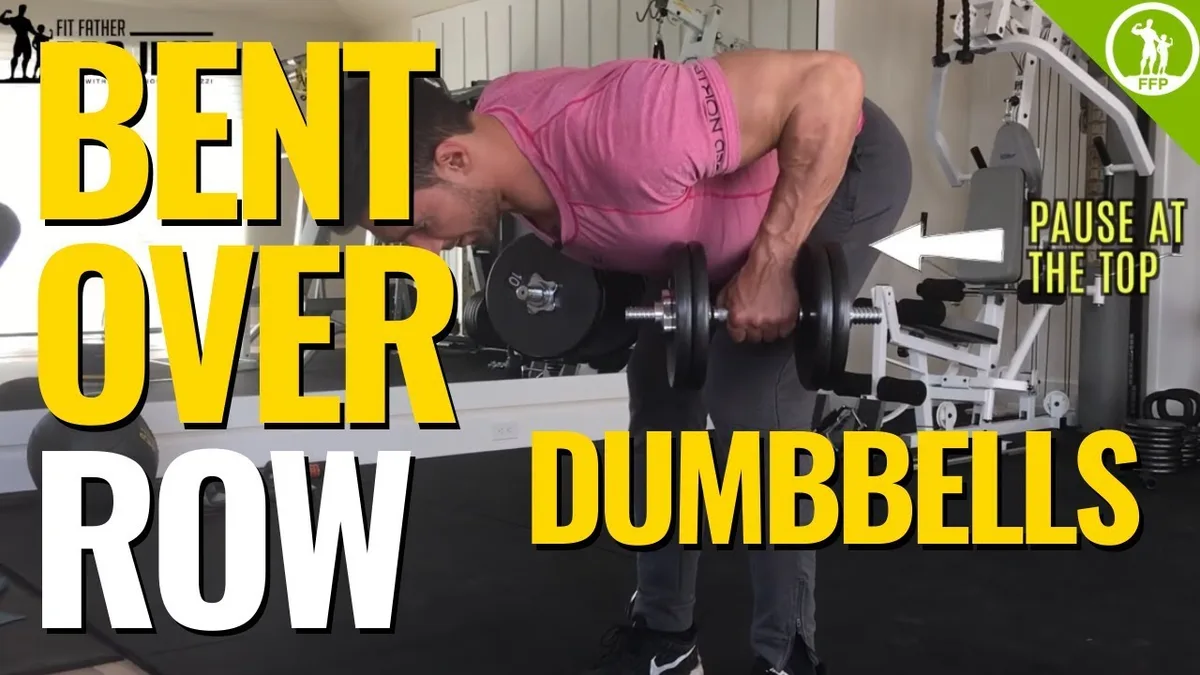
Image source: YouTube / Fit Father Project, Fitness For Busy Fathers (YouTube thumbnail (fair-use with source credit))
Elbow flares out. When the elbow points away from the body, the load shifts to your rear delts and upper traps. You lose the lat stretch. The fix: keep your elbow close to your ribcage.
Imagine you’re trying to scratch your hip with your elbow.
Torso rotation. The body twists as you pull. This happens when the weight is too heavy or your core isn’t braced. The fix: tighten your abs and keep your non-working hand firmly planted.
If you’re rotating, drop the weight by 10 pounds and reset.
Shoulder shrugs at the top. If your shoulder creeps up toward your ear at the peak of the pull, you’re using your upper traps instead of your lats. The fix: keep your shoulder blade down throughout the movement. Think “proud chest, low shoulders.”
Quick lowering. Dropping the weight in half a second means you lose the eccentric stretch. The fix: take a full two seconds to lower the dumbbell. Count it if you have to.
How to Choose the Right Weight and When to Increase
Picking the right weight isn’t about ego. It’s about control. Here’s a simple rule: if you can’t keep your back flat and your elbow close for 10 clean reps, the weight is too heavy.
Start light. For most men, that means 30 to 40 pounds. For most women, 15 to 25 pounds. These numbers come from aggregate reviews of beginner lifting programs.
The goal is to learn the movement pattern first. Add weight only when you can do 12 reps with perfect form.
The double progression method. This is the standard way to increase load safely. First, add reps. If you can do 10 reps with good form, aim for 11 next week.
Then 12. Once you hit 12 clean reps, add 5 pounds and drop back to 8 reps. Repeat.
This keeps your form intact while forcing progress.
Signs it’s time to increase weight:
- You can complete 12 reps without your form breaking down.
- You don’t feel a strong contraction in your lats or mid-back.
- You’re not challenged by the last two reps of each set.
- Your recovery feels easy, you’re not sore the next day.
Signs you need to drop weight:
- Your lower back rounds before you finish the set.
- You feel the pull mostly in your biceps or shoulders.
- You have to jerk or swing the weight to get it up.
- Your grip gives out before your back muscles fatigue.
If grip strength is the limiting factor, consider using lifting straps or chalk. They let your back do the work instead of your forearms. But don’t rely on them too early.
A strong grip transfers to other lifts like the dumbbell deadlift, where holding the bar is half the battle.
Best Variations to Try (Kneeling, Underhand, Chest-Supported)
The standard single-arm dumbbell row is great, but variations can target different areas or solve specific problems.
Kneeling single-arm row. Place one knee on the bench instead of standing. This reduces the demand on your lower back and lets you focus purely on the row. It’s a good option if you have a history of lumbar issues.
The trade-off is less total body tension, so you might not lift as heavy.
Underhand (supinated) grip row. Flip your palm so it faces forward. This shifts more work to your biceps and lower lats. It’s a useful variation for hitting the lats from a slightly different angle.
Use it as an accessory movement after your main rows.
Chest-supported dumbbell row. You’ll need an incline bench set to about 45 degrees. Lie face down on it with a dumbbell in each hand. This completely removes lower back strain.
It’s ideal for high-rep pump work or for anyone recovering from a back injury. Research shows chest-supported rows produce similar EMG activation in the lats as bent-over rows, but with less spinal stress.
Meadows row (landmine row). This uses a landmine attachment or a barbell wedged in a corner. The angle is different, and it allows a more natural pull path. It’s a favorite among powerlifters for building back thickness.
Which variation is best for you?
- If your lower back is sensitive: try the kneeling or chest-supported row.
- If you want more lat emphasis: try the underhand grip.
- If you’re a beginner: stick with the standard single-arm row until your form is solid.
Programming Tips: Sets, Reps, and Where to Fit This in Your Workout
The single-arm dumbbell row is a horizontal pull. It belongs on your pull day or back day. Here’s how to program it effectively.
For muscle growth (hypertrophy): 3 to 4 sets of 8 to 12 reps per side. Rest 60 to 90 seconds between sets. This rep range targets the lats and rhomboids for size.
Use a weight where rep 10 feels hard but doable.
For strength: 4 to 5 sets of 5 to 8 reps per side. Rest 2 to 3 minutes. Use a heavier weight.
Focus on explosive pulls and controlled negatives. Form still matters; don’t sacrifice it for load.
For endurance or warm-up: 2 sets of 15 to 20 reps per side with a light weight. This is great for blood flow and activation before heavier compound lifts.
Where to place it in your workout:
- As a primary back exercise: put it early in your session, after your warm-up.
- As an accessory: place it after deadlifts or pull-ups.
- As a finisher: use it at the end with higher reps and lighter weight.
Sample back day structure:
- Deadlift or pull-up (main compound)
- Single-arm dumbbell row (primary accessory)
- Lat pulldown or cable row (secondary accessory)
- Face pull or rear delt fly (finisher)
If you’re training at home with limited equipment, the single-arm row is one of the most effective back exercises you can do. It pairs well with goblet squats with dumbbells for a full-body session. You get a pull, a squat, and a hinge all in one workout.
Safety Considerations and When to Skip This Exercise
The single-arm dumbbell row is safe for most people. But it’s not right for everyone. If you have a herniated disc or acute lower back pain, skip the bent-over version.
Use a chest-supported row instead.
Stop immediately if you feel sharp pain. Dull muscle fatigue is normal. Sharp or shooting pain is not. Check your form first.
If the pain persists, see a physical therapist. The National Strength and Conditioning Association recommends consulting a qualified professional before performing loaded bent-over exercises if you have a known spinal condition.
Warm up before heavy sets. Do 10 to 15 light reps on each side. This pumps blood into your lats and rhomboids. Cold muscles tear more easily.
A proper warm-up cuts your injury risk significantly.
Frequently Asked Questions
Which side should I row first?
Start with your weaker side. Do your full set on that side, then match the reps on your stronger side. This prevents imbalances from getting worse.
Should I touch the dumbbell to the floor each rep?
No. Keep constant tension on the muscle. Stop just short of the floor.
Touching down lets you rest and bounce, which reduces the work your back does.
Can I do this exercise every day?
Not recommended. Your back muscles need 48 to 72 hours to recover. Train it twice per week for best results.
Overtraining leads to stalled progress and higher injury risk.
What if I don’t have a bench?
Use a sturdy chair, couch arm, or a low table. The key is a stable surface at the right height. Your torso should be nearly parallel to the floor.