Complete Guide to How to Hold a Dumbbell
How to hold a dumbbell might seem like common sense, but a small mistake can lead to a big injury. Your grip affects your wrist alignment, your forearm strain, and which muscles actually do the work. Get it right and lifting feels smoother.
Get it wrong and you're one heavy set away from pain.
As of 2026, most standard dumbbell handles measure between 25 and 32 mm across. That range sounds small, but it changes how your palm sits around the bar. Manufacturer specs also show that thicker handles require more grip strength, which can distract from the target muscle.
Let's break down the safe way to grip, the common errors, and the cues that actually work.
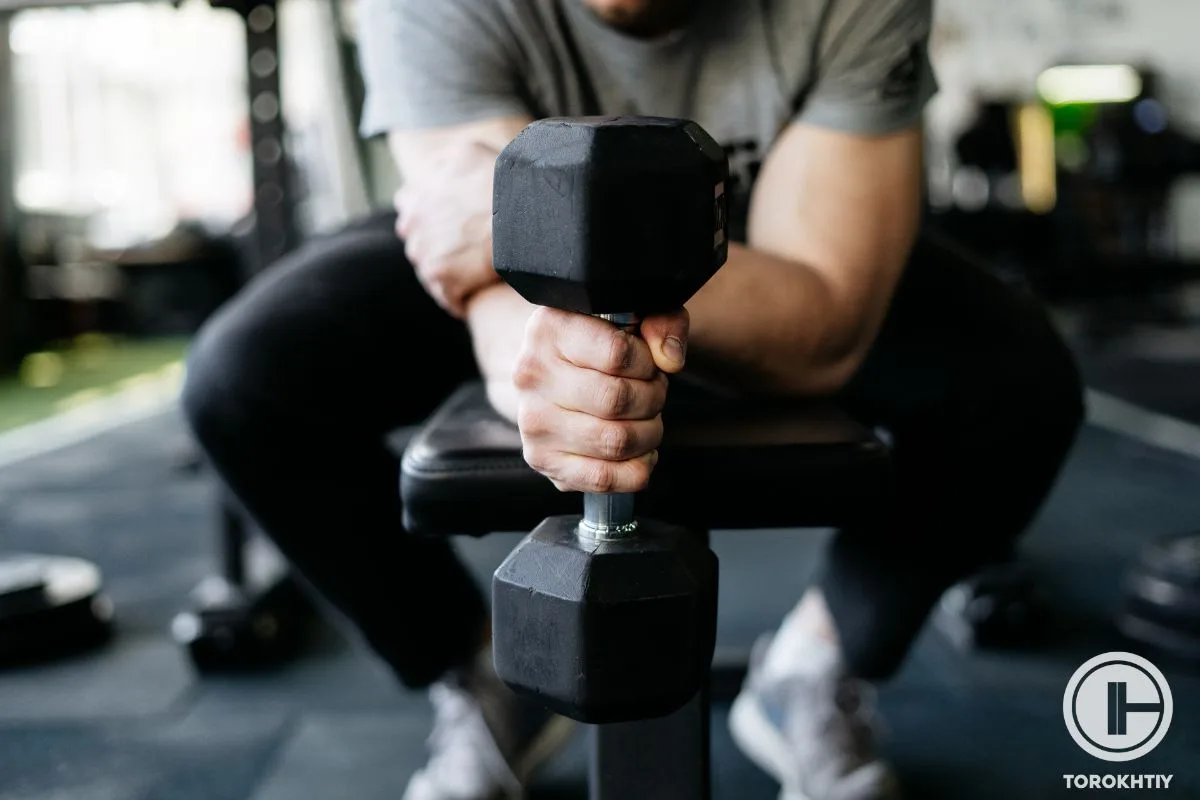
Image source: Web (Bing) / torokhtiy.com (Web image (fair-use with source credit))
Quick Answer
Rest the handle across your finger base, not your palm. Keep your wrist straight. Squeeze the handle firmly.
Wrap your thumb around the bar. Adjust your grip for each exercise.
Why Your Grip on a Dumbbell Matters More Than You Think
Your hand is the only contact point between you and the weight. If that point is unstable, everything above it compensates. Think about a heavy bicep curl with a bent wrist.
Your forearm muscles take over, your wrist aches, and your bicep gets less tension than it should.
The American College of Sports Medicine highlights the neutral wrist position as the safest way to lift. That means your knuckles, wrist, and forearm stay in a straight line. When you get this right, you transfer force cleanly through your arm.
When you don't, your joints absorb the stress instead of your muscles.
Your grip also decides when your muscles give out. A weak or awkward hold will fail before your bicep or chest does. That's why choosing the right load matters as much as your form.
If you're new to training, this guide to picking a sensible starting weight helps you avoid the guessing game.
Grip strength isn't just for heavy lifts. It affects every dumbbell movement, from light lateral raises to heavy presses. A solid grip keeps the weight stable, so your joints stay in the right position.
Over time, that consistency builds more muscle with less wear and tear.
Grip problems rarely start during the first set. They build up across a session. By the time you feel discomfort, you've already been compensating for several exercises.
That's why checking your grip before every set is the smartest habit you can build.
How to Hold a Dumbbell: The Core Basics You Need
There are two fundamentals to nail before you add weight to any exercise: where the handle sits and how your wrist lines up. Get both right and your grip feels automatic.
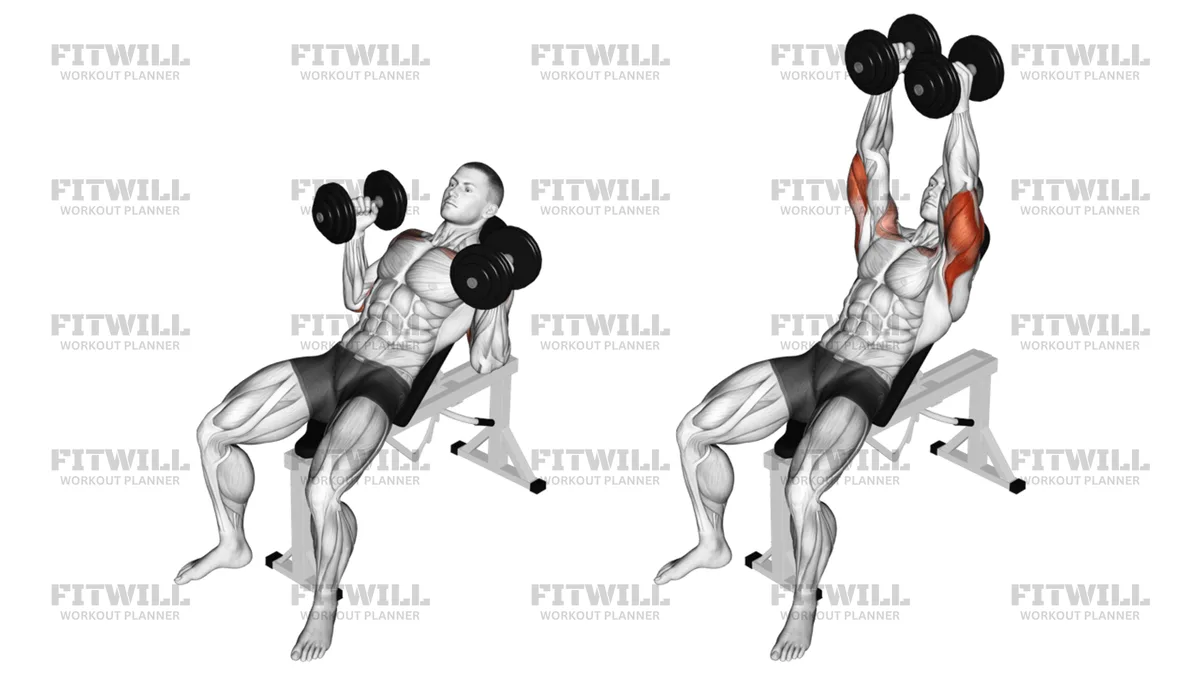
Image source: Bing (Web (fair-use with source credit))
Where the Handle Should Sit in Your Palm
The handle should rest diagonally across the base of your fingers, right where they meet your palm. That spot gives you maximum control and lets your fingers wrap fully around the bar. If the handle sits dead center in your palm, it pushes your wrist out of line.
It also creates a small gap between your palm and the bar, which makes the weight feel heavier than it is.
A simple way to check is to open your hand and place the bar on your finger roots. Close your fingers over it, then wrap your thumb around. You should see a small row of palm lines above the bar.
That means the grip is in the supportive zone, not resting on the fleshy pad.
Your hand size also plays a role. A thicker handle feels different in a small hand. If the handle is too thick, you lose full finger closure.
If it's too thin, you may over-squeeze to feel secure. Both can pull your wrist out of neutral.
Neutral Wrist Alignment: Straight Is Safe
Neutral wrist alignment means your hand stays in line with your forearm. No bending upward, no dropping downward. Imagine a straight line running from your elbow through your knuckles.
That line should stay straight for curls, presses, rows, and raises.
If your wrist hinges back during a front raise, the front of your forearm strains. If it curls forward during a press, you lose pressing power. Both habits hurt over time.
Cue yourself to keep your wrist firm but not locked.
For most lifters, the neutral grip feels most natural. It also works for nearly every dumbbell exercise. If you're buying your first set, adjustable dumbbells are worth considering because they let you change loads quickly.
Grip Variations and When to Use Them
Your grip changes with the exercise. There isn't one perfect hold for everything. The three main options are overhand, underhand, and neutral.
| Grip | How It Looks | Best For | Watch Out For |
|---|---|---|---|
| Overhand | Hands face away from you | Presses, rows, deadlifts | Can put extra strain on wrists in curl patterns |
| Underhand | Hands face toward you | Curls, upright rows | Can strain the bicep tendon if your grip is too narrow |
| Neutral | Hands face each other | Hammer curls, farmer carries, presses | Feels most natural, takes wrist stress away |
Overhand Grip
An overhand grip means your palms face down or away from your body. You'll use it for most pressing movements, rows, and overhead work. Keep the handle across your finger base and your wrist straight.
This grip gives you raw pushing power and works well for holding heavier loads.
Underhand Grip
An underhand grip means your palms face up. It's the go-to for bicep curls and some vertical pulls. Because your arm is rotating outward, your shoulder position matters.
Keep your elbows close to your sides and don't let your wrist collapse backward at the top of the curl.
Neutral Grip
A neutral grip has your palms facing each other, like holding a hammer. This is the most wrist-friendly option because your forearm stays in its natural position. Use it for hammer curls, neutral-grip presses, and farmer carries.
Many lifters find they can handle more weight in this grip because it feels stable.
Some lifters switch grip mid-workout to hit different angles. That's normal. Just reset your hand placement and check your wrist position before the next set.
If you're wondering whether dumbbells are enough on their own, the answer is usually yes. A neutral grip alone can support a full training program.
How Tight Should You Squeeze the Handle?
Firm, but not white-knuckle tight. Imagine holding a full water bottle without crushing it. That's close to the right tension for most exercises.
Your forearm muscles control your grip. If you squeeze with maximum force, they tire out before your target muscle. That becomes a bigger problem with higher reps.
Keep steady pressure, and only ramp it up for heavy singles or carries.
One useful cue is to think about squeezing the middle of your palm slightly upward. That activates your hand without locking your wrist. If you notice white knuckles, loosen up.
If the weight feels like it's sliding, tighten slightly.
Here's a rough grip tension scale based on exercise type:
- Isolation moves like curls or flys: 5 out of 10
- Compound moves like presses or rows: 7 out of 10
- Heavy carries and deadlifts: 9 out of 10
Grip fatigue also affects your total workout volume. If you're planning a session, knowing how many reps you should be doing helps you pace yourself. That way, your forearms don't give out before your chest or back does.
Common Grip Mistakes That Cause Injury
These mistakes show up constantly in gyms. They're easy to fix, but they're also easy to overlook until something starts hurting.
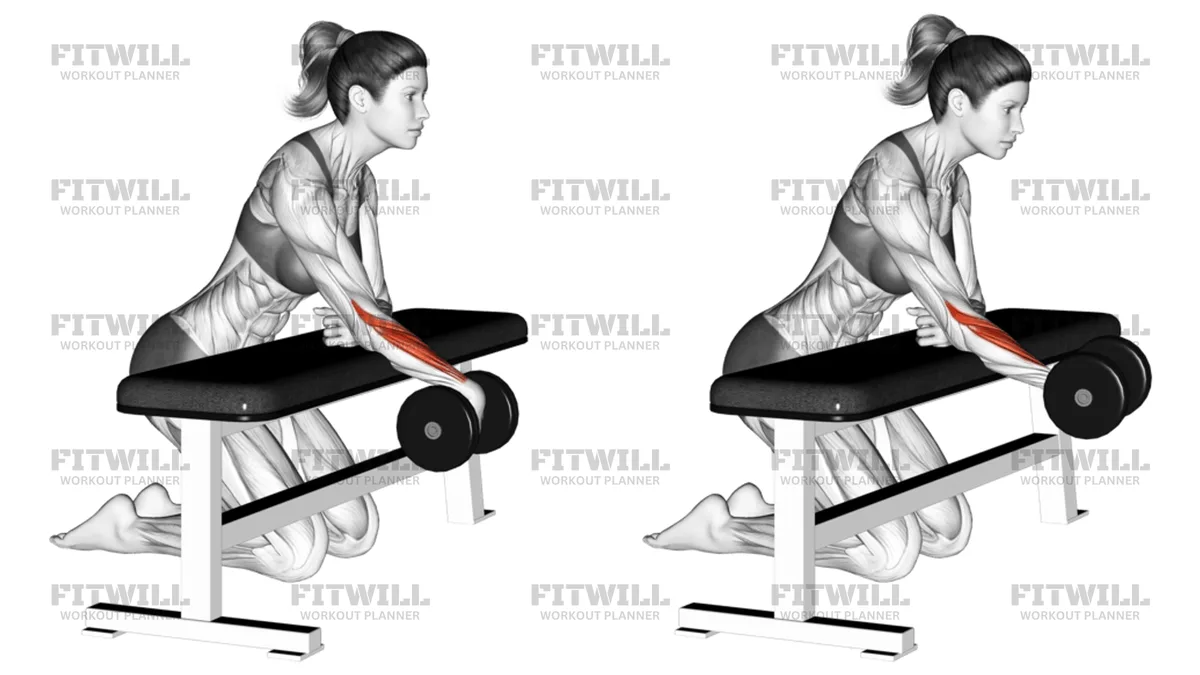
Image source: Web (Bing) / fitwill.app (Web image (fair-use with source credit))
Here are the most common ones to avoid:
- Handle buried in the middle of your palm. This makes your wrist bend and reduces control.
- Bent wrist during curls or presses. Your grip should never force your wrist out of line.
- Thumbless grip. Hooking the bar without your thumb is risky if the weight gets away from you.
- Squeezing too hard. Excess grip tension creates forearm cramps and early fatigue.
- Loose fingers. Letting the handle drift toward your fingertips robs you of power and can cause drops.
Another mistake is starting with a weight that's too heavy. When your grip is already struggling, your form breaks down. Start with a load that lets you keep your wrist straight for every rep.
That's why finding a size that matches your strength level is worth the effort before you push up.
Numbness or tingling in your fingers is a red flag. It often means nerve compression. If that happens, stop and reassess your grip width and wrist angle.
If you feel sharp pain in your wrist or persistent soreness in your forearm, don't push through it. The American Physical Therapy Association recommends checking in with a professional when joint pain affects your daily movement or training.
Wrist Pain and When to See a Professional
Some wrist aches are normal muscle soreness. Others are warning signs. The line between them matters more than most lifters think.
Sharp pain during a lift is a red flag. So is clicking, popping, or a feeling of instability. Numbness or tingling in your fingers often points to nerve compression.
None of these will fix themselves if you keep training through them.
If pain sticks around after your workout, or if you notice swelling and weakness, stop lifting. The American Physical Therapy Association recommends seeing a professional when joint pain limits your daily activities or keeps coming back. A physical therapist can spot whether your grip or wrist angle is the root cause.
Wrist pain from a bad grip is common. But it's also preventable. Fix your hand placement, keep your wrist neutral, and let the discomfort guide you.
Pain is not a badge of honor.
Choosing Dumbbells That Fit Your Hand
Not all dumbbells feel the same in your hand. Handle diameter, texture, and weight distribution all change how you grip. A handle that fits one person perfectly can feel awkward in another.
Standard handles range from 25 mm to 32 mm. Thicker handles build grip strength but demand more hand strength to hold. A 35 mm handle can feel like a fat bar, especially for lifters with smaller hands.
| Handle Feature | What It Affects | Who It Suits Best |
|---|---|---|
| Slim handle (25–28 mm) | Easier to grip, less forearm strain | Beginners, isolation exercises |
| Medium handle (28–32 mm) | Balanced comfort and stability | Most regular lifters |
| Knurled texture | Improves traction, reduces slipping | Heavy lifting, sweaty hands |
| Smooth chrome | Easier on hands, but slippery | Light reps, high-volume work |
Knurling is the crosshatched texture on some metal handles. It gives your fingers extra purchase, which helps on presses and rows. If your hands sweat, knurled handles feel much safer.
If the knurling is too aggressive, it can tear calluses.
Fixed dumbbells have one weight, so their handle size stays constant. Adjustable dumbbells often have a longer, thicker handle to fit the weight plates. That changes the grip feel compared to a fixed set.
If you're thinking about adjustable models, it's worth checking the handle dimensions before buying.
Safe Handling Tips for Heavy Dumbbells
Heavy weight changes the game. Your grip has to be rock solid before the dumbbell even leaves the rack.
Set your grip properly before you lift. Place the handle across your finger base, wrap your thumb, and squeeze. Never grab a heavy dumbbell mid-lift and hope your hand finds the right spot.
When picking a heavy dumbbell off the floor, use both hands to get it into position. Start it on your thighs, then use a knee kick to press it up to your shoulder. This saves your grip for the actual exercise.
Control the descent too. Many grip injuries happen when lifters let the weight drop and catch it. That sudden jerk forces your wrist out of neutral.
Lower with control and keep your forearm in line with the handle.
If your grip gives out before your target muscle, the weight is likely too heavy. Find a load that lets you hold the bar steadily through every rep. That's especially true for pressing moves and rows.
Expert Tips for a More Comfortable, Secure Grip
Small adjustments make a big difference. These cues work across most dumbbell exercises:
- Squeeze the handle like you're crushing a can. Not so hard your knuckles turn white, but firm enough to feel stable.
- Keep the bar low in your fingers. Letting it drift up to your fingertips reduces control.
- Use chalk if your hands sweat. It's the cheapest grip insurance you can buy.
- Keep your wrist straight even when you're tired. Fatigue makes your wrist bend first.
- Change your grip angle between sets. It spreads the load across different hand positions.
A common mistake is gripping harder than needed on light exercises. Lateral raises and flys only need a comfortable hold. Save the death grip for heavy carries and deadlift-style moves.
Your forearms will thank you later.
Quick Grip Reference for Common Dumbbell Exercises
Here's a cheat sheet for the most popular dumbbell moves. Use it to double-check your hand position before each set.
| Exercise | Recommended Grip | Cue to Remember |
|---|---|---|
| Bicep curl | Underhand | Keep wrist straight, curl with your biceps |
| Hammer curl | Neutral | Palms face each other, elbows tucked |
| Chest press | Overhand | Handle across finger base, wrists stacked |
| Overhead press | Neutral or overhand | Forearms vertical, wrists straight |
| One-arm row | Overhand | Pull the elbow back, keep wrist neutral |
| Lateral raise | Neutral | Lead with your elbows, not your hands |
For presses, your wrist should stay stacked above your elbow. If your wrist bends backward, you lose power and strain the joint. The same rule applies to rows and most pulling moves.
This reference is a starting point. Individual anatomy varies, so adjust slightly if something feels tight. A neutral grip is rarely the wrong choice.
When in doubt, keep your wrists straight and your fingers wrapped.
Final Verdict: What to Remember Every Time You Pick One Up
Set the handle low across your finger base. Wrap your thumb around the bar, and keep your wrist straight. That's the whole secret.
Everything else is practice.
Start with a weight that lets you hold this position without shaking. Check your grip before every set, not just the first one. If your wrist bends, your grip is wrong or the load is too heavy.
Use a neutral grip when in doubt. It's the most forgiving option and works for most exercises. For pressing moves, keep your forearm stacked under your hand.
For curls, keep your elbow tight and your wrist stable.
Pay attention to handle size too. A 25 mm to 32 mm range suits most hands. Knurled handles help when your palms sweat.
If you're still working out the basics, mastering the grip is the foundation for everything else. Start there and the rest of the movement gets easier. If you're choosing your first set, the right grip makes even a modest pair of dumbbells feel solid and safe.
Frequently Asked Questions
Should your thumb wrap around the dumbbell?
Yes. Always wrap your thumb around the handle. It prevents the weight from rolling out of your hand and gives you control on every rep.
The thumbless grip may feel comfortable, but it's risky, especially with heavier dumbbells.
Why does my wrist hurt when I hold a dumbbell?
A bent wrist is the usual cause. When your hand hinges backward or forward, the joint absorbs the load instead of your forearm muscles. Reset the handle to your finger base and keep your wrist in a straight line.
Persistent pain should be checked by a professional.
How tight should you squeeze a dumbbell?
Squeeze firmly but not to maximum force. Think of holding a water bottle without crushing it. A relaxed but secure grip is enough for most exercises.
Reserve the death grip for heavy carries and deadlifts, where stopping power matters.
Does grip strength affect your workout?
It does. Your grip fails before your target muscles. That's why weak hands can limit bicep curls, rows, and presses.
Building grip strength with farmer carries and dead hangs helps you lift heavier and train longer without your forearms giving out.
Are thicker dumbbell handles better?
Thicker handles demand more grip strength but can feel unstable for beginners. Standard 28 mm to 32 mm handles balance comfort and control. If you have smaller hands or wrist issues, stick with a slimmer handle.
Knurled textures also improve traction for sweaty or heavy sessions.