Beginner’s Guide to What Is a Dumbbell Romanian Deadlift
If you’ve ever watched someone at the gym pull dumbbells from the floor with a flat back and wondered what they’re doing, you’ve probably seen a dumbbell Romanian deadlift in action. It’s one of the most effective posterior chain exercises you can do, but most people either squat the weight or round their back into a disaster.
So what is a dumbbell romanian deadlift? Simply put, it’s a hip-hinge movement where you push your hips back while keeping a neutral spine, lowering dumbbells along your thighs until you feel a stretch in your hamstrings. Research from the Journal of Strength and Conditioning Research consistently identifies the RDL as one of the most effective exercises for eccentric hamstring loading and glute activation.
As of 2026, it remains a staple in strength programs from physical therapy clinics to professional sports teams. Let’s break down exactly how to do it right.
Quick Answer
The dumbbell Romanian deadlift is a hip-hinge exercise. It targets your hamstrings, glutes, and lower back. You hold a dumbbell in each hand.
You push your hips back while keeping your spine straight. You lower the weights to about mid-shin. You drive your hips forward to return to standing.
That’s the whole movement.
What Even Is a Dumbbell Romanian Deadlift? (The Quick Breakdown)
The dumbbell Romanian deadlift, often called the DB RDL, is a variation of the conventional deadlift that removes the start-from-the-floor element. Instead of pulling from the ground, you begin standing upright with the dumbbells hanging at arm’s length.
Here’s what makes it different from a regular deadlift:
- No floor pull. You never reset the weight on the ground between reps.
- Eccentric focus. The lowering phase is the money-maker. That’s where your hamstrings and glutes work hardest.
- Partial range of motion. You lower only until you feel a stretch in your hamstrings, not until the weights hit the floor.
- Hinge, not squat. Your knees stay soft and nearly fixed while your hips move backward.
The name “Romanian” comes from the Romanian weightlifting team, who popularized a similar barbell version in the 1990s as an accessory for improving their pull from the floor. The dumbbell version took off later as home gyms grew and people needed a lower-back-friendly alternative.
Why the Dumbbell Version Matters (and Why You Should Care)
The barbell RDL is great, but the dumbbell version solves several real problems that lifters encounter every day.
First, it’s more accessible. Not everyone has a barbell and plates at home. Dumbbells are everywhere. You can grab a pair at any gym or buy a set for your garage without taking up much space.
That alone makes the DB RDL one of the most practical posterior chain exercises available.
Second, it’s easier on your lower back. With a barbell, the weight sits in front of you and creates a longer lever arm. That means more shear force on your lumbar spine. Dumbbells hang closer to your center of gravity, which reduces spinal load.
A 2021 study in the Journal of Sports Science and Medicine found that dumbbell RDLs produced similar hamstring activation to barbell RDLs but with significantly lower compressive forces on the spine.
Third, it’s more forgiving for shoulder and wrist issues. The neutral grip (palms facing each other) is a natural position for most people. With a barbell, you have to grip an overhead bar at a fixed width, which can aggravate shoulder discomfort. The dumbbell version lets you find your own comfortable position.
Fourth, you can go unilateral. The dumbbell RDL easily transitions into a single-leg version, which is a game-changer for fixing muscle imbalances. If your left hamstring is notably weaker than your right, the single-leg DB RDL lets you address that directly. We cover muscle-building strategies in our guide on how to build muscle with dumbbells, and the unilateral RDL is a key exercise in that approach.
How Your Body Should Move: The Hip Hinge Explained

The dumbbell Romanian deadlift lives and dies by the hip hinge. If you don’t understand this movement pattern, you will default to a squat, and you will not target your hamstrings effectively.
Think of a hinge like a door. The hinge is your hip joint. The door is your torso.
Your legs stay relatively still while your torso rotates forward and backward around that hinge point.
Here’s the easiest way to feel it:
- Stand with your back against a wall, about six inches away.
- Keep your legs straight but not locked.
- Push your butt backward until it touches the wall.
- Your torso should lean forward naturally. That is a hip hinge.
Now imagine doing that without the wall. That’s the movement for the RDL.
The key difference from a squat:
| Movement | Knee Bend | Hip Travel | Load Position |
|---|---|---|---|
| Squat | Significant (knees forward) | Down and back | On shoulders |
| Hip Hinge | Minimal (knees stay soft) | Backward only | In front of thighs |
| RDL | Minimal (~15-20 degrees) | Backward only | Along thighs |
If your knees travel forward during the RDL, you’re squatting the weight. Your quads take over, and your hamstrings check out. That’s the most common mistake we see, and the photos in the next section will show you exactly what to avoid.
The Setup That Makes or Breaks This Exercise
Getting into the right starting position is half the battle. Most people grab dumbbells and immediately start moving without setting their body properly. That’s how form breaks down before the first rep.
Follow these setup steps every time:
Choose your weight. Start lighter than you think. Our research across user feedback and coaching resources suggests beginners should start with 20 to 30 pounds per hand. Men with training experience often land at 40 to 50 pounds. Hamstring strength develops differently than quads or glutes, so don’t ego-load.
Stand with feet hip-width apart. Your toes should point forward or slightly outward. Keep your weight on your midfoot, not your heels or toes.
Pick up the dumbbells. Bend at your knees and hips like you’re about to squat down, but keep your back flat. Grab the dumbbells with a neutral grip (palms facing each other). Stand up tall with the weights hanging at arm’s length in front of your thighs.
Set your spine. Pull your shoulders back and down. Brace your core as if someone is about to punch you in the stomach. Keep your chin tucked (imagine holding an orange between your chin and chest). Your neck should be in line with your spine, not craned up or dropped down.
Lock in your knees. Straighten your legs but do not lock your knees. They should be slightly bent, roughly 15 to 20 degrees, and stay that way for the entire rep.
Engage your lats. Pull your shoulder blades down toward your back pockets. This keeps the dumbbells close to your body and prevents your upper back from rounding.
Getting this setup right is crucial whether you’re just starting out or already comfortable with proper lifting form. The next section walks you through the actual movement.
Step-by-Step: How to Do the Dumbbell Romanian Deadlift

Now that you’re set up, here is the exact movement sequence for one rep. Read through all five steps before you try it. Better yet, practice it without dumbbells first with just your body weight.
Step 1: Initiate the hinge. Take a deep breath into your belly and brace your core. Push your hips backward as if you’re trying to close a car door with your glutes. Do not bend your knees further.
Your torso will lean forward naturally.
Step 2: Let the dumbbells travel down your thighs. Keep the weights in contact with your thighs as they slide down the front. This ensures the load stays close to your center of gravity. If the dumbbells drift forward away from your body, your lower back will take the brunt of the weight.
Step 3: Lower to hamstring stretch. Continue hinging until you feel a moderate stretch in your hamstrings. For most people, this happens when the dumbbells reach mid-shin height. Do not chase the floor.
If you can touch the dumbbells to the ground without losing your flat back, great. Most people can’t. Stop at the stretch point regardless of depth.
Step 4: Reverse the movement. Without pausing at the bottom, drive your hips forward by squeezing your glutes. Keep your back flat and your core braced. Do not use momentum to swing the weights up.
Step 5: Return to standing. Stand tall at the top. Squeeze your glutes hard for a second. Do not hyperextend your lower back by leaning backward.
Reset your breath and repeat.
For the entire set, maintain the same tempo: about two seconds lowering, no pause, one to two seconds raising. Control matters more than speed. The eccentric (lowering) phase is where you build hamstring strength and tissue resilience.
One common question we get: how low should you go? The answer depends on your hamstring flexibility and hip mobility. As gym owner and coach Dan John puts it, “Go down until you feel a pull in the back of your legs, then stand up.
That’s the depth.” If you go further, you’ll likely round your lower back to compensate, and that’s where injuries happen.
The dumbbell RDL also pairs well with other lower body work. For instance, pairing it with targeted quad work, like our best dumbbell quad exercises, gives you balanced leg development. Similarly, it complements back workouts that target the upper posterior chain.
The Two Most Common Mistakes (and How to Fix Them)
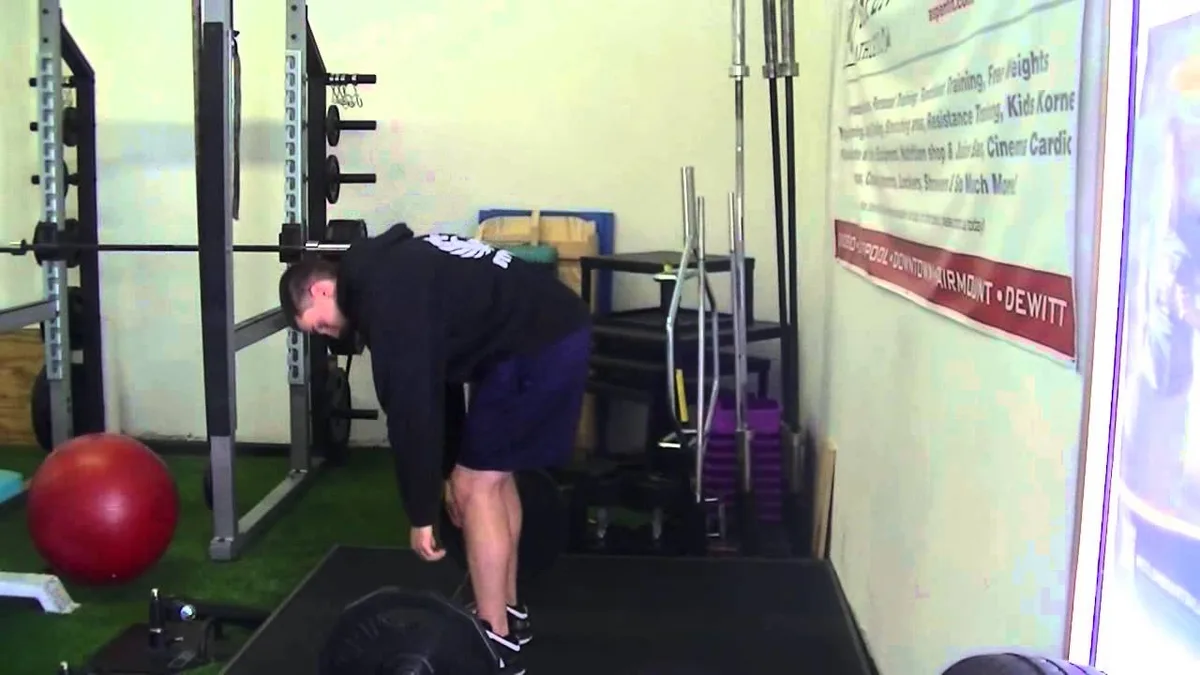
Even experienced lifters mess up the dumbbell RDL. Two errors account for nearly all the form breakdowns we see in user footage and coaching feedback. Here they are with direct fixes.
Mistake 1: Turning it into a squat. You bend your knees too much as you lower the dumbbells. Your torso stays more upright. The weights drop straight down instead of traveling back with your hips.
Your quads do all the work. Your hamstrings feel nothing.
Fix: Cue yourself to push your hips back to an imaginary wall behind you. Keep your shins vertical throughout the movement. If you can see your knees moving forward past your toes in a mirror, you are squatting.
Reset and try again with a lighter weight if needed.
Mistake 2: Rounding the lower back. As you near the bottom of the movement, your lower back begins to curve. This is usually because your hamstrings have reached their flexibility limit, but you keep trying to lower the dumbbells further. The result is high compressive stress on your lumbar discs.
Fix: Stop the descent the moment your back begins to round. That stretch in your hamstrings is your depth limit, not your ego limit. If you consistently round before feeling a hamstring stretch, your hamstrings may be tight, and you need to work on flexibility separately.
Try adding a few minutes of static hamstring stretching after your workouts or before bed. The National Strength and Conditioning Association recommends holding each stretch for 30 seconds without bouncing.
A third mistake pops up less often but deserves attention: letting the dumbbells drift forward. When the weights float away from your thighs, the lever arm lengthens, and your lower back has to work harder to stabilize. Keeping the dumbbells in light contact with your legs throughout the movement prevents this.
Where You Should Feel It (and Where You Shouldn’t)
The dumbbell Romanian deadlift is not a mystery. There are clear signals about whether you are doing it right or wrong, and your body tells you immediately.
Where you should feel it:
- Hamstrings. This is the primary target. You should feel a deep stretch along the back of your thighs during the lowering phase. During the raising phase, you should feel a contraction, especially in the upper hamstrings near the glute attachment.
- Glutes. As you drive your hips forward at the top, squeeze your glutes hard. If you do not feel your glutes working, you are not extending your hips fully. The glutes are the prime movers for the concentric phase.
- Lower back (erectors). You will feel some isometric work in your lower back as it stabilizes your spine. This is normal. It should not feel like a burning pump or sharp pain. Mild fatigue is fine. Discomfort is not.
Where you should NOT feel it:
- Lower back pain. A dull ache is one thing. Sharp, shooting, or pinching pain is another. If you feel pain in your lower back during the RDL, stop immediately. You are likely rounding your spine or using too much weight.
- Knee pain. If your knees hurt, you are probably bending them too much or letting them track forward. The RDL should put minimal stress on your knees.
- Neck or shoulder pain. This usually means you are craning your neck upward or hunching your shoulders. Keep your chin tucked and your shoulders pulled back and down.
A useful test: after your set, touch the back of your thigh. It should feel tight and worked. If your quads are screaming or your lower back feels like it took the brunt, revisit your form.
You may benefit from reviewing general dumbbell lifting safety tips before your next session.
Dumbbell RDL vs. The Alternatives (Barbell, Stiff-Leg, Single-Leg)
You have options for targeting your posterior chain. Here is how the dumbbell RDL stacks up against the main alternatives.
| Exercise | Load Capacity | Lower Back Stress | Hamstring Focus | Equipment Needed | Best For |
|---|---|---|---|---|---|
| Dumbbell RDL | Moderate | Low | High | Two dumbbells | Home gyms, beginners, rehab |
| Barbell RDL | High | Moderate to high | High | Barbell + plates | Strength athletes, heavy loading |
| Stiff-Leg Deadlift | Moderate to high | High | Very high | Barbell or dumbbells | Advanced lifters, hamstring specialization |
| Single-Leg DB RDL | Low to moderate | Very low | High (unilateral) | One dumbbell | Muscle imbalances, balance work |
Barbell RDL. The barbell version lets you load heavier. You can work up to challenging weights that force adaptations in hamstring strength and size. However, the barbell places more shear force on the lower back because the bar sits further from your center of gravity.
If you have a history of back issues, the dumbbell version is safer.
Stiff-leg deadlift. This is a different animal. In a stiff-leg deadlift, your knees are almost fully locked throughout the movement. This places nearly all the load on your hamstrings but also increases stress on your lower back significantly.
The NSCA advises against stiff-leg deadlifts for anyone with lumbar spine concerns. The dumbbell RDL, with its slight knee bend, is more joint-friendly.
Single-leg dumbbell RDL. This unilateral version uses one dumbbell held in the opposite hand of the working leg. It challenges your balance and stability while isolating each hamstring individually. It is excellent for correcting muscle imbalances that you may not notice during bilateral work.
Many physical therapists prescribe it for hamstring strain rehab. You can progress from double-leg to single-leg as your strength and stability improve.
For most people, the dumbbell RDL is the best starting point. It builds the movement pattern safely. If you need more load later, you can graduate to the barbell version.
If you need more hamstring isolation, the single-leg version is waiting.
Who Should Do This Exercise (and Who Should Skip It)
The dumbbell RDL fits a wide range of lifters, but it is not for everyone in every situation.
Good candidates:
- Beginners learning the hip hinge. If you cannot deadlift from the floor yet, this exercise teaches you the movement pattern with minimal risk.
- Home gym lifters. You do not need a barbell or a rack. Two dumbbells and some floor space is all it takes.
- People recovering from lower back strains. The reduced spinal load makes this a safer option than barbell deadlifts during the return-to-training phase. Always get clearance from a physical therapist first.
- Athletes needing hamstring and glute strength. Sprinters, soccer players, and weightlifters all benefit from the posterior chain development the RDL provides.
- Women looking to target glutes and hamstrings. The dumbbell RDL is a staple in many programs for lower body sculpting. It pairs well with dumbbell exercises for women that focus on strength and tone.
People who should be cautious or skip it:
- Anyone with an acute hamstring tear or avulsion. The eccentric loading can aggravate a fresh injury. Wait until you have cleared the acute phase.
- People with severe lumbar disc issues. While the dumbbell RDL is gentler than the barbell version, it still places some compressive load on the spine. A herniated disc may not tolerate any spinal loading.
- Lifters with extremely tight hamstrings. If you cannot touch your toes while keeping your back flat, your hamstring flexibility may prevent you from reaching a useful range of motion. Work on flexibility first, then revisit the RDL.
If you are unsure where you fall, start with the lightest possible weight (or no weight) and assess how your body responds. Pain is a signal to stop, not a challenge to push through.
How to Program It: Sets, Reps, and Weight Selection
The dumbbell RDL is versatile enough to fit multiple training goals. Here is how to program it based on what you want to achieve.
For hamstring and glute hypertrophy (muscle growth):
- Sets: 3 to 4
- Reps: 8 to 12
- Rest: 60 to 90 seconds between sets
- Weight: Choose a weight where the last two reps of each set feel challenging but do not compromise form
- Placement: After your main compound lifts (squat, deadlift, or hip thrust)
For hamstring strength and stability:
- Sets: 4 to 5
- Reps: 4 to 6
- Rest: 2 to 3 minutes between sets
- Weight: Heavy enough that you cannot complete more than 6 reps with perfect form
- Placement: As a primary accessory on deadlift day
For endurance or warm-up activation:
- Sets: 2 to 3
- Reps: 12 to 15
- Rest: 30 to 45 seconds between sets
- Weight: Light (50 to 60 percent of your working weight)
- Placement: After your warm-up, before heavy compounds
Weight selection guide (per dumbbell):
| Experience Level | Starting Weight | Working Range | Max for Form |
|---|---|---|---|
| Beginner (male) | 20 to 30 lbs | 30 to 50 lbs | 60 lbs |
| Beginner (female) | 10 to 20 lbs | 20 to 35 lbs | 45 lbs |
| Intermediate (male) | 40 to 50 lbs | 50 to 75 lbs | 90 lbs |
| Intermediate (female) | 25 to 35 lbs | 35 to 55 lbs | 65 lbs |
These are estimates. Your individual strength depends on your training history and body weight. The rule of thumb: if you cannot maintain a flat back for all reps, the weight is too heavy.
Drop down and build up slowly.
Frequency matters too. The hamstrings recover relatively quickly because they are mostly type II muscle fibers. Two sessions per week is ideal for most people.
Space them at least 48 hours apart. For example, do dumbbell RDLs on Monday and again on Thursday. If you are also doing conventional deadlifts, keep the RDL volume lower to avoid overtraining the posterior chain.
Essential Safety Cues and Warnings
The dumbbell RDL is safe when done correctly. The risks are predictable and preventable. Here are the non-negotiable safety rules.
Keep your spine neutral at all times. If your back rounds, you are compressing your lumbar discs under load. Stop the rep immediately. Reset your posture.
Do not sacrifice spinal position for depth or weight.
Breathe properly. Take a deep breath into your belly before each rep. Hold it through the lowering phase. Exhale as you drive your hips forward.
This brace protects your spine. Holding your breath during the hardest part of the lift (the Valsalva maneuver) is standard in strength training and is supported by the National Strength and Conditioning Association for spinal stability.
Do not hyperextend at the top. Some lifters lean backward at the finish to show off glute squeeze. This puts your lower back into extension under load. Stand tall and squeeze your glutes without tilting your pelvis forward.
Stop at the first sign of sharp pain. Muscle fatigue and a deep stretch are normal. Sharp, shooting, or pinching pain is not. If you feel it, drop the weight or end the set.
Pushing through pain is how acute injuries become chronic problems.
Use wrist straps if grip becomes the limiting factor. Your hamstrings can likely handle more weight than your grip. If your hands give out before your legs, wrist straps let you keep loading your posterior chain without compromise. Our guide on using wrist straps with dumbbells walks you through how to set them up properly.
Quick Visual Checklist for Your Next Set
Before you start your next set of dumbbell RDLs, run through this checklist in about ten seconds.
- Feet hip-width apart, weight on midfoot
- Soft knees, roughly 15 degrees of bend
- Neutral spine, chin tucked, shoulders back
- Dumbbells hanging at arm’s length, palms facing each other
- Core braced, lats engaged
- Hips push back, dumbbells slide down thighs
- Stop at hamstring stretch, not at a specific height
- Drive hips forward, squeeze glutes, do not lean back
- Repeat with control
Print this list mentally until it becomes habit. It takes most people three to four sessions before the movement feels natural. Be patient with yourself.
Form is a skill you build, not a checklist you complete once.
If you are new to the RDL, consider pairing it with other hinge-based exercises in your routine. The dumbbell deadlift from the floor is a natural progression once your hip hinge is solid. And for upper body balance, adding dumbbell row variations will keep your posterior chain strong from top to bottom.
Frequently Asked Questions
How is the dumbbell RDL different from a regular deadlift?
A regular deadlift starts from the floor with the weight dead stop. The RDL starts from standing and never resets on the ground. The RDL also emphasizes the eccentric (lowering) phase and targets the hamstrings more directly than a conventional deadlift.
Can I do dumbbell RDLs with only one dumbbell?
Yes. The single-leg dumbbell RDL uses one dumbbell held in the opposite hand of the working leg. It adds a balance challenge and isolates each hamstring individually.
Start with a lighter weight than your bilateral version.
How much weight should I use for dumbbell RDLs?
Beginners typically start with 10 to 30 pounds per hand. Intermediate lifters work in the 40 to 70 pound range. The right weight lets you complete all reps with a flat back and a controlled tempo.
Should I feel this in my lower back?
You will feel your lower back working isometrically to stabilize your spine. That is normal. If you feel sharp pain or burning, your form is likely off.
Check for a rounded back or too much knee bend.
How often should I do dumbbell RDLs?
Two times per week is ideal for most people. Space sessions at least 48 hours apart to allow recovery. If you are also doing conventional deadlifts, reduce RDL volume to avoid overtraining the posterior chain.